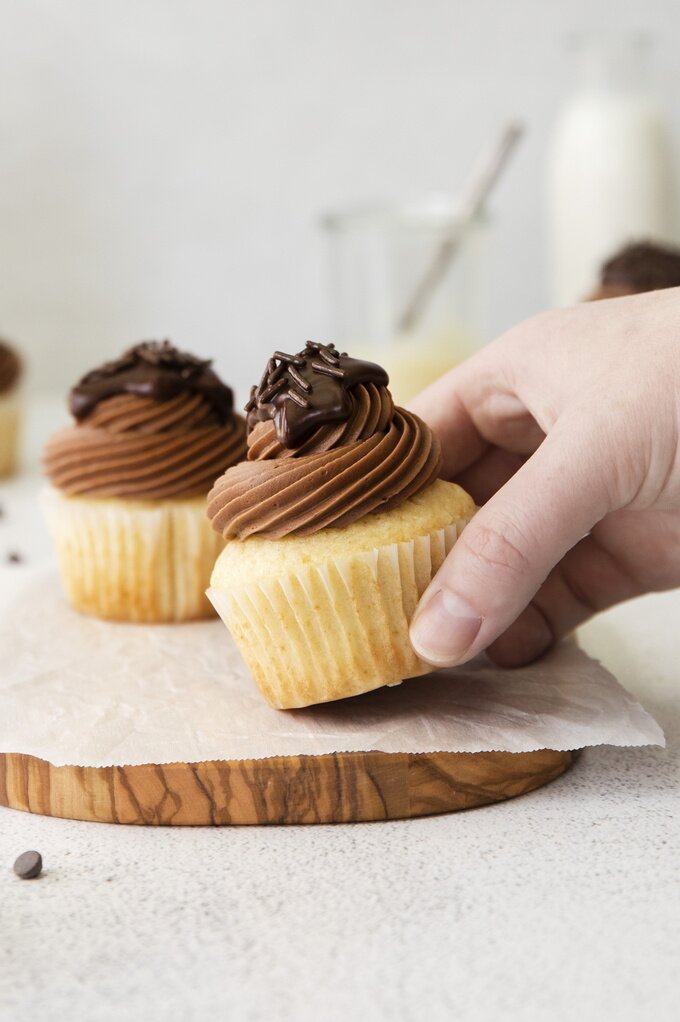
Boston Cream Cupcakes – All of your favorite boston cream pie flavors in a cupcake! Vanilla cupcakes with cream filling, chocolate buttercream frosting, and chocolate ganache.

Boston Cream Cupcakes
Boston cream donuts are a guilty pleasure of mine that I love getting from our local bakery. I was eating one a few months ago when I was planning out a cupcake recipe I was going to make and I had an epiphany – why not try making a boston cream cupcake recipe?! I decided to go with a vanilla cupcake base that would be scooped out and filled with a vanilla cream. It would then be topped with a chocolate buttercream frosting and rich chocolate ganache. This cupcake checks every box of what a boston cream donut is and tastes amazing!

Common Questions About Making Boston Cream Cupcakes
What are boston cream cupcakes?
Boston cream cupcakes are classic vanilla cupcakes that are filled with a homemade cream filling and topped with both a chocolate buttercream frosting and chocolate ganache.

How many servings does this recipe make?
This recipe makes 12 cupcakes.

How long do these cupcakes last?
These cupcakes last up to two days when stored in a refrigerated airtight container.

How can I make the perfect cupcakes?
- Follow the recipe – While I totally understand dietary restrictions, if you plan on making changes to the ingredients, I cannot guarantee the recipe will work. If you are facing this problem, I will gently suggest that you may want to consider finding a cupcake recipe on a site that specifically develops for the diet you are on such as a keto baking website or vegan baking website. Too many times have I seen recipes for wrong for people because they started to adjust the recipe too much.
- Don’t over-mix the cupcakes – If you want to keep cupcakes light and airy, avoiding over-mixing is key. Mix until just barely combined.
- Let the cupcakes completely cool before frosting – This is a classic mistake that people constantly make (including me). Your cupcakes are done baking, you are ready to sit down and eat one so you touch the cupcake and say “this is most definitely cool” even though it’s only been out of the oven for like, 5 minutes. Wrong. Your frosting will just slide off the cupcake and it’ll be really sad. To be safe, I’d say give them 1-2 hours before frosting.
- Don’t over fill the cupcake liners – If you overfill the cupcake liners, you will definitely have some overflow which isn’t pretty and elegant. Stick to filling each liner about 3/4 full.
- Spin the cupcake tin halfway through cooking – An oven’s heat is generally not terribly even so a simple way to make sure all of the cupcakes cook all the way through is to spin the pan about 1/2 way through baking 180 degrees.

Ingredient Notes –
For the Cupcakes
- Flour is the base of our cupcake – make sure to measure using the spoon and level method so you don’t end up with dry cupcakes.
- Sugar helps sweeten the cupcakes.
- Baking powder helps the cupcakes rise.
- Milk keeps the cupcake light and soft.
- Vegetable oil helps keep the cupcakes moist so they don’t dry out.
- Eggs bind the cupcakes together so they don’t fall apart.
- Vanilla enhances the sweetness of the cupcakes.
For the Cream Filling
- Milk makes a rich and delicious pastry cream.
- Egg yolks thicken the cream filling while also adding additional richness.
- Sugar helps sweeten the cream.
- Cornstarch absorbs extra moisture and thickens the cream.
- Vanilla bean paste adds great vanilla flavor, as well as little specks of vanilla bean. Feel free to substitute 1 teaspoon vanilla extract or the caviar from 1 vanilla bean.
- Butter makes the cream silky and smooth.
For the Chocolate Buttercream
- Butter adds great flavor to the frosting and keeps it from becoming too dry.
- Vanilla enhances the flavor of the cocoa.
- Powdered sugar adds sweetness and structure to the buttercream.
- Cocoa powder adds great chocolate flavor to the buttercream. Make sure to use unsweetened baking cocoa.
For the Chocolate Ganache
- I used semi-sweet chocolate but feel free to use any kind you like – just make sure it’s good quality!
- Heavy cream helps the chocolate melt into a smooth ganache. You must use heavy cream, not milk.
- Coconut oil helps the chocolate melt and makes a smooth and shiny ganache.
Looking for more cupcake recipes? Check these out!

Boston Cream Cupcakes
Boston Cream Cupcakes - All of your favorite boston cream pie flavors in a cupcake! Vanilla cupcakes with cream filling, chocolate buttercream frosting, and chocolate ganache.
Ingredients
For the Cupcake
- 1 1/2 cups all-purpose flour
- 1 cup granulated sugar
- 1 teaspoon baking powder
- 1/2 cup whole milk
- 1/2 cup vegetable oil
- 2 large eggs
- 1 teaspoon vanilla extract
For the Cream Filling
- 1/2 cup whole milk
- 2 large egg yolks
- 3 tablespoons granulated sugar
- 1 tablespoon cornstarch
- 1 teaspoon vanilla bean paste
- 1/2 tablespoon butter
For the Chocolate Buttercream
- 1 stick (1/2 cup) butter (softened)
- 1 teaspoon pure vanilla extract
- 2 1/4 cups powdered sugar
- 1/4 cup cocoa powder
For the Chocolate Ganache
- 1/2 cup chocolate chips
- 1/3 cup heavy cream
- 2 teaspoon coconut oil
Instructions
For the Cupcake
- Preheat your oven to 350 degrees F and line 12 muffin tins with paper liners.
- In a large bowl, whisk together the flour, sugar, and baking powder.

- In another bowl, whisk together the milk, vegetable oil, eggs, and vanilla.

- Add the wet ingredients to the dry and mix just until no lumps of flour remain.

- Divide the batter between the muffin tins, filling each one 3/4 of the way full with batter.
- Bake for 14-16 minutes, or until a toothpick inserted into the center comes out clean.
- Remove the cupcakes from the pan and transfer them to a wire rack to cool completely.

For the Cream Filling
- Heat the milk in a small saucepan set over medium heat, just until it starts to steam.
- In a small heat-proof bowl, whisk together egg yolks, sugar, and cornstarch for 1 minute, or until they become pale yellow.

- Next, slowly whisk in the milk a little at a time. Make sure not to add it all at once or you may scramble your eggs.

- Once all of the milk has been incorporated, return the egg mixture to the saucepan and set it over medium heat again.
- Cook, stirring constantly, for 3-4 minutes or until the cream has thickened. It will be very thin and then thicken very quickly - don't stop stirring or it may burn!
- Once the cream has thickened, remove it from the heat and add the vanilla bean paste and butter. Whisk to combine.
- Transfer the cream to an airtight container and cover the surface with plastic wrap (make sure the plastic is directly touching the cream so it doesn't form a skin). Transfer the cream to the fridge and chill until it is no longer hot - about 1 hour.
For the Chocolate Buttercream
- Add the butter and vanilla to the bowl of a stand mixer fitted with the paddle attachment. Beat on medium speed until the butter is light and fluffy - about 1 minute.
- Next, sift together the powdered sugar and cocoa powder to remove any lumps.
- With the mixer on low speed, slowly add the dry ingredients into the butter.
- Once all of the dry ingredients have been incorporated, turn the mixer to high speed and beat until the frosting becomes light and fluffy - about 1 minute.
- Transfer the frosting to a piping bag fitted with your choice of tip and set aside until ready to use.
For the Chocolate Ganache
- Add the heavy cream, chocolate chips, and coconut oil to a small microwave-safe bowl.
- Microwave for 30 seconds and stir. If the chocolate is not fully melted, microwave it for an additional 30 seconds and stir.
- Whisk until the ganache is smooth. Set it aside to cool to room temperature before using. The ganache should be pourable but not warm (you don't want it to melt the buttercream).
Assembly
- Scoop out the center of each cupcake and fill it with 2 teaspoons of pastry cream.
- Pipe the chocolate buttercream on top and finish the top with a small drizzle of chocolate ganache.
- Enjoy the cupcakes immediately or store them in an airtight container in the fridge for up to two days. Bring to room temperature before enjoying.

Never miss a Mildly Meandering recipe
Facebook / Instagram / Pinterest

Check out the web story for this recipe by clicking HERE.